When we decided to redesign my kids’ playroom, I wanted to make sure that my 10 year olds were involved in the process. As a professional organizer, I encourage my clients to get their kids involved wherever possible so that the kids get excited about the process. Plus, when they are involved in the decision-making and final result, I’ve seen time and time again that it helps them keep up with the organization and in general, a more organized lifestyle. Organization becomes a way of life rather than a one time event. And, I don’t know about in your house, but anything to get my kids to put away the ingredients to their most recent craft experiment sounded ideal to me!
HOW TO GET KIDS INVOLVED IN THE ORGANIZATION
Here are the steps that I followed when deciding on the type of organization that we would need in my girls’ playroom.
CATEGORIES
Before we started to choose products, we created a list of categories that would be needed to be stored. Since my girls love to create slime and other equally messy crafts, I knew that we would need compartments to keep each of these categories separated.
Categorization can be general depending on the area of your home that you are working on. In a closet, for example, you can get away with a broad category like “tops” or “pants”, but when you’re working in a space that has so many specific purposes, you want to break down the categories even more.
For my girls, categories included everything from glitter to glue to scrap paper and everything in between.
ZONES
Once we had the categories established, we created zones based on the way that my kids play. For example, the coloring and bead-related supplies would never be used while they were making their own slime, so those zones could be stored separately.
Also, since my girls create slime more often than they do draw or create jewelry, I knew that the “slime zone” would need to be the most accessible area to where they will be creating at their table.
CONTAIN
Having an idea of the type of categories and zones that we were working with made us ready to move to my favorite part of all projects: the product and design selection. Having measured the available space, I knew what type of square footage I had to work with and used that to guide my selections.
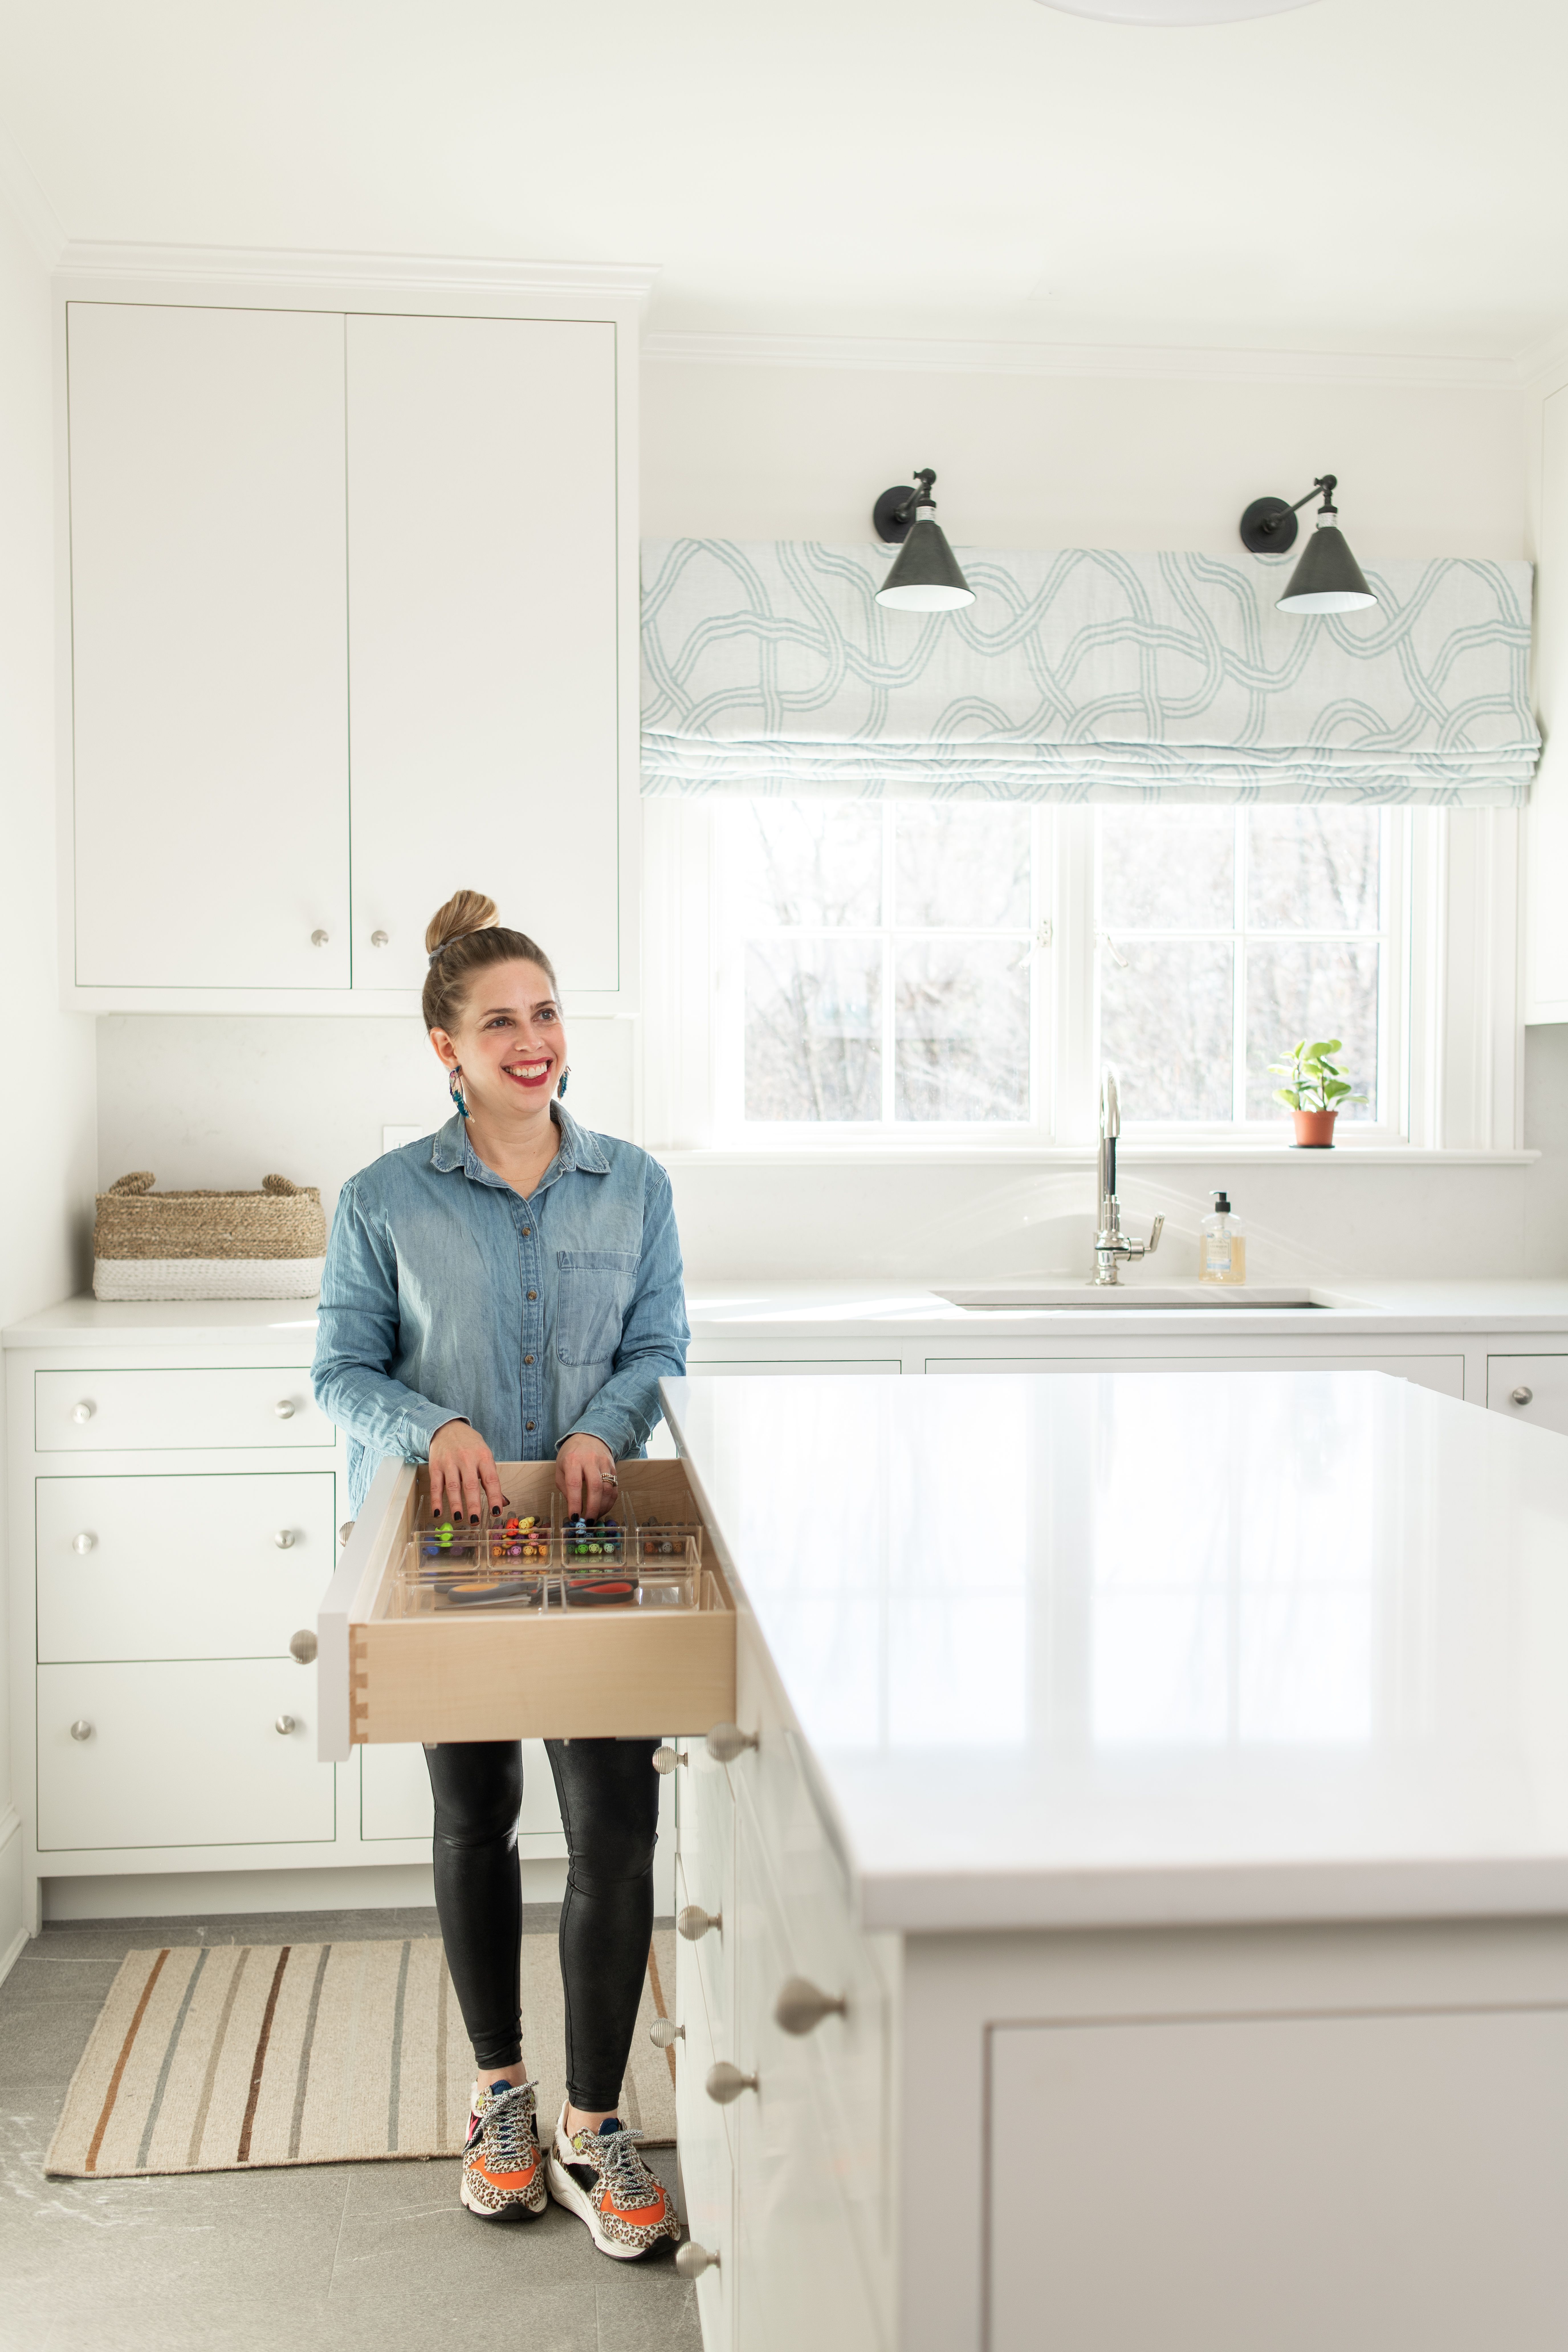
Since slime involved so many categories and they were using those on a daily basis, I wanted those supplies to be super creative. I knew that having drawers dedicated to each category would make the contents easy for my girls to access, which means that clean-up should be just as easy.
For larger items, like yarn or craft kits, I wanted to add storage to open shelving so that my girls could still easily see their options and be encouraged to pull them off of the shelf to add to their arts and crafts rotation. Oftentimes kids get into a routine of using or playing with what they can see and what is most accessible, which is why I made it a priority to keep everything easy to see and easy to reach.
Finally, for their supplies like markers, colored pencils, and crayons, we used my favorite clear containers to sort each of the categories. Clear containers are a great way to corral the contents while still making it easy to identify what’s inside, even if you are storing them behind closed doors like we were. Any time my girls want to create with paper and pens or markers, they know they can go to that zone in their playroom to easily find the supplies.
DESIGN
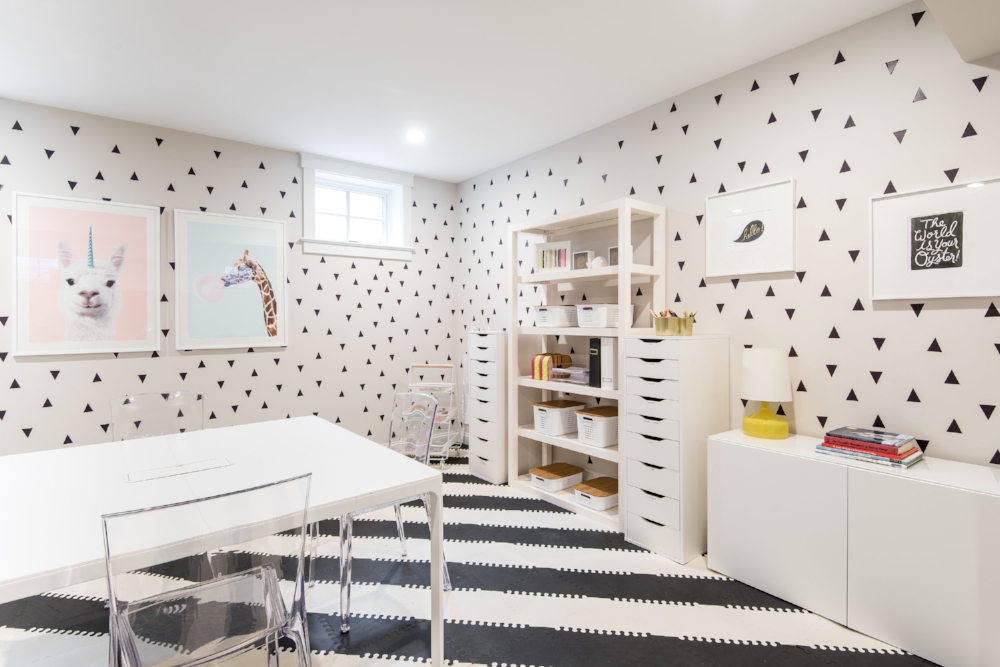
Unlike my children, I lean towards a more black and white palette. Since we were designing a kids’ space I wanted it to be fun and full of personality, but also wanted to make sure that it tied into the rest of the home’s aesthetic and was light and bright since the space is in our basement. By using a playful pattern on the wall I was able to get the black and white style that I was looking for, while still feeling like a fun spot for kids. As an added bonus, the wall decals are removable, so that if and when we change the space in years to come, it will be an easy transition. (Make sure to check out the discount code below because Urban Walls makes some amazing wall decals which we have used not just in our basement but in our entire house!)
Together with my girls we chose the fun art pieces on the wall which we then had framed by Meredith at Frame Avenue Design, which we all agree makes the room a fun space to be in. By mixing furniture that I already had, like these chairs and this bookcase with some new furniture, we were able to create a wall of organization that kept all of the supplies stored together. Finally, one of the best decisions we made was adding floor tiles, which gives a pop of color and pattern while making protecting the carpet underneath. The floor is easy to wipe up spills and the girls are really able to let loose, which I love (and know they do too!).
SOURCE LIST
-
Framing: Frame Avenue Design ℅
-
Llama & Giraffe art print: Society6
-
Wall decals: Urbanwalls (PS: use the code TENOFF to receive 10% off of your order!
-
Flooring: Skip Hop
-
Desk: Ikea
-
Storage unit: Ikea
-
Storage drawers: Ikea
-
Storage cart: Ikea
-
Pen cups: Ikea
-
Aprons: Rue La La
-
Shelving: West Elm
-
Storage bins: The Container Store
-
“Hello” & “The World is Your Oyster” print: Rifle Paper Co.




+ show Comments
- Hide Comments
add a comment